Docker, Deployment
You can find the Dockerfile to build litellm proxy here
Quick Start
To start using Litellm, run the following commands in a shell:
# Get the code
git clone https://github.com/BerriAI/litellm

# Go to folder
cd litellm

# Add the master key - you can change this after setup
echo 'LITELLM_MASTER_KEY="sk-1234"' > .env

# Add the litellm salt key - you cannot change this after adding a model
# It is used to encrypt / decrypt your LLM API Key credentials
# We recommend - https://1password.com/password-generator/
# password generator to get a random hash for litellm salt key
echo 'LITELLM_SALT_KEY="sk-1234"' >> .env

source .env

# Start
docker-compose up
Docker Run
Step 1. CREATE config.yaml
Example litellm_config.yaml
model_list:
  - model_name: azure-gpt-3.5
    litellm_params:
      model: azure/<your-azure-model-deployment>
      api_base: os.environ/AZURE_API_BASE # runs os.getenv("AZURE_API_BASE")
      api_key: os.environ/AZURE_API_KEY # runs os.getenv("AZURE_API_KEY")
      api_version: "2023-07-01-preview"
Step 2. RUN Docker Image
docker run \
    -v $(pwd)/litellm_config.yaml:/app/config.yaml \
    -e AZURE_API_KEY=d6*********** \
    -e AZURE_API_BASE=https://openai-***********/ \
    -p 4000:4000 \
    ghcr.io/berriai/litellm:main-latest \
    --config /app/config.yaml --detailed_debug
Get Latest Image 👉 here
Step 3. TEST Request
Pass model=azure-gpt-3.5 this was set on step 1
curl --location 'http://0.0.0.0:4000/chat/completions' \
    --header 'Content-Type: application/json' \
    --data '{
    "model": "azure-gpt-3.5",
    "messages": [
        {
        "role": "user",
        "content": "what llm are you"
        }
    ]
}'
Docker Run - CLI Args
See all supported CLI args here:
Here's how you can run the docker image and pass your config to litellm
docker run ghcr.io/berriai/litellm:main-latest --config your_config.yaml
Here's how you can run the docker image and start litellm on port 8002 with num_workers=8
docker run ghcr.io/berriai/litellm:main-latest --port 8002 --num_workers 8
Use litellm as a base image
# Use the provided base image
FROM ghcr.io/berriai/litellm:main-latest

# Set the working directory to /app
WORKDIR /app

# Copy the configuration file into the container at /app
COPY config.yaml .

# Make sure your docker/entrypoint.sh is executable
RUN chmod +x ./docker/entrypoint.sh

# Expose the necessary port
EXPOSE 4000/tcp

# Override the CMD instruction with your desired command and arguments
# WARNING: FOR PROD DO NOT USE `--detailed_debug` it slows down response times, instead use the following CMD
# CMD ["--port", "4000", "--config", "config.yaml"]

CMD ["--port", "4000", "--config", "config.yaml", "--detailed_debug"]
Build from litellm pip package
Follow these instructions to build a docker container from the litellm pip package. If your company has a strict requirement around security / building images you can follow these steps.
Dockerfile
FROM cgr.dev/chainguard/python:latest-dev

USER root
WORKDIR /app

ENV HOME=/home/litellm
ENV PATH="${HOME}/venv/bin:$PATH"

# Install runtime dependencies
RUN apk update && \
    apk add --no-cache gcc python3-dev openssl openssl-dev

RUN python -m venv ${HOME}/venv
RUN ${HOME}/venv/bin/pip install --no-cache-dir --upgrade pip

COPY requirements.txt .
RUN --mount=type=cache,target=${HOME}/.cache/pip \
    ${HOME}/venv/bin/pip install -r requirements.txt

EXPOSE 4000/tcp

ENTRYPOINT ["litellm"]
CMD ["--port", "4000"]
Example requirements.txt
litellm[proxy]==1.57.3 # Specify the litellm version you want to use
prometheus_client
langfuse
prisma
Build the docker image
docker build \
  -f Dockerfile.build_from_pip \
  -t litellm-proxy-with-pip-5 .
Run the docker image
docker run \
    -v $(pwd)/litellm_config.yaml:/app/config.yaml \
    -e OPENAI_API_KEY="sk-1222" \
    -e DATABASE_URL="postgresql://xxxxxxxxx \
    -p 4000:4000 \
    litellm-proxy-with-pip-5 \
    --config /app/config.yaml --detailed_debug
Terraform
s/o Nicholas Cecere for his LiteLLM User Management Terraform
Kubernetes
Deploying a config file based litellm instance just requires a simple deployment that loads the config.yaml file via a config map. Also it would be a good practice to use the env var declaration for api keys, and attach the env vars with the api key values as an opaque secret.
apiVersion: v1
kind: ConfigMap
metadata:
  name: litellm-config-file
data:
  config.yaml: |
      model_list:
        - model_name: gpt-3.5-turbo
          litellm_params:
            model: azure/gpt-turbo-small-ca
            api_base: https://my-endpoint-canada-berri992.openai.azure.com/
            api_key: os.environ/CA_AZURE_OPENAI_API_KEY
---
apiVersion: v1
kind: Secret
type: Opaque
metadata:
  name: litellm-secrets
data:
  CA_AZURE_OPENAI_API_KEY: bWVvd19pbV9hX2NhdA== # your api key in base64
---
apiVersion: apps/v1
kind: Deployment
metadata:
  name: litellm-deployment
  labels:
    app: litellm
spec:
  selector:
    matchLabels:
      app: litellm
  template:
    metadata:
      labels:
        app: litellm
    spec:
      containers:
      - name: litellm
        image: ghcr.io/berriai/litellm:main-latest # it is recommended to fix a version generally
        ports:
        - containerPort: 4000
        volumeMounts:
        - name: config-volume
          mountPath: /app/proxy_server_config.yaml
          subPath: config.yaml
        envFrom:
        - secretRef:
            name: litellm-secrets
      volumes:
        - name: config-volume
          configMap:
            name: litellm-config-file
To avoid issues with predictability, difficulties in rollback, and inconsistent environments, use versioning or SHA digests (for example, litellm:main-v1.30.3 or litellm@sha256:12345abcdef...) instead of litellm:main-latest.
Helm Chart
[BETA] Helm Chart is BETA. If you run into an issues/have feedback please let us know https://github.com/BerriAI/litellm/issues
Use this when you want to use litellm helm chart as a dependency for other charts. The litellm-helm OCI is hosted here https://github.com/BerriAI/litellm/pkgs/container/litellm-helm
Step 1. Pull the litellm helm chart
helm pull oci://ghcr.io/berriai/litellm-helm

# Pulled: ghcr.io/berriai/litellm-helm:0.1.2
# Digest: sha256:7d3ded1c99c1597f9ad4dc49d84327cf1db6e0faa0eeea0c614be5526ae94e2a
Step 2. Unzip litellm helm
Unzip the specific version that was pulled in Step 1
tar -zxvf litellm-helm-0.1.2.tgz
Step 3. Install litellm helm
helm install lite-helm ./litellm-helm
Step 4. Expose the service to localhost
kubectl --namespace default port-forward $POD_NAME 8080:$CONTAINER_PORT
Your LiteLLM Proxy Server is now running on http://127.0.0.1:4000.
That's it ! That's the quick start to deploy litellm
Make LLM API Requests
💡 Go here 👉 to make your first LLM API Request
LiteLLM is compatible with several SDKs - including OpenAI SDK, Anthropic SDK, Mistral SDK, LLamaIndex, Langchain (Js, Python)
Deployment Options
| Docs | When to Use |
|---|---|
| Quick Start | call 100+ LLMs + Load Balancing |
| Deploy with Database | + use Virtual Keys + Track Spend (Note: When deploying with a database providing a DATABASE_URL and LITELLM_MASTER_KEY are required in your env ) |
| LiteLLM container + Redis | + load balance across multiple litellm containers |
| LiteLLM Database container + PostgresDB + Redis | + use Virtual Keys + Track Spend + load balance across multiple litellm containers |
Deploy with Database
Docker, Kubernetes, Helm Chart
Requirements:
- Need a postgres database (e.g. Supabase, Neon, etc) Set
DATABASE_URL=postgresql://<user>:<password>@<host>:<port>/<dbname>in your env - Set a
LITELLM_MASTER_KEY, this is your Proxy Admin key - you can use this to create other keys (🚨 must start withsk-)
- Dockerfile
- Kubernetes
- Helm
- Helm OCI Registry (GHCR)
We maintain a separate Dockerfile for reducing build time when running LiteLLM proxy with a connected Postgres Database
docker pull ghcr.io/berriai/litellm-database:main-latest
docker run \
    -v $(pwd)/litellm_config.yaml:/app/config.yaml \
    -e LITELLM_MASTER_KEY=sk-1234 \
    -e DATABASE_URL=postgresql://<user>:<password>@<host>:<port>/<dbname> \
    -e AZURE_API_KEY=d6*********** \
    -e AZURE_API_BASE=https://openai-***********/ \
    -p 4000:4000 \
    ghcr.io/berriai/litellm-database:main-latest \
    --config /app/config.yaml --detailed_debug
Your LiteLLM Proxy Server is now running on http://0.0.0.0:4000.
Step 1. Create deployment.yaml
apiVersion: apps/v1
kind: Deployment
metadata:
  name: litellm-deployment
spec:
  replicas: 3
  selector:
    matchLabels:
      app: litellm
  template:
    metadata:
      labels:
        app: litellm
    spec:
      containers:
        - name: litellm-container
          image: ghcr.io/berriai/litellm:main-latest
          imagePullPolicy: Always
          env:
            - name: AZURE_API_KEY
              value: "d6******"
            - name: AZURE_API_BASE
              value: "https://ope******"
            - name: LITELLM_MASTER_KEY
              value: "sk-1234"
            - name: DATABASE_URL
              value: "po**********"
          args:
            - "--config"
            - "/app/proxy_config.yaml"  # Update the path to mount the config file
          volumeMounts:                 # Define volume mount for proxy_config.yaml
            - name: config-volume
              mountPath: /app
              readOnly: true
          livenessProbe:
            httpGet:
              path: /health/liveliness
              port: 4000
            initialDelaySeconds: 120
            periodSeconds: 15
            successThreshold: 1
            failureThreshold: 3
            timeoutSeconds: 10
          readinessProbe:
            httpGet:
              path: /health/readiness
              port: 4000
            initialDelaySeconds: 120
            periodSeconds: 15
            successThreshold: 1
            failureThreshold: 3
            timeoutSeconds: 10
      volumes:  # Define volume to mount proxy_config.yaml
        - name: config-volume
          configMap:
            name: litellm-config
kubectl apply -f /path/to/deployment.yaml
Step 2. Create service.yaml
apiVersion: v1
kind: Service
metadata:
  name: litellm-service
spec:
  selector:
    app: litellm
  ports:
    - protocol: TCP
      port: 4000
      targetPort: 4000
  type: NodePort
kubectl apply -f /path/to/service.yaml
Step 3. Start server
kubectl port-forward service/litellm-service 4000:4000
Your LiteLLM Proxy Server is now running on http://0.0.0.0:4000.
[BETA] Helm Chart is BETA. If you run into an issues/have feedback please let us know https://github.com/BerriAI/litellm/issues
Use this to deploy litellm using a helm chart. Link to the LiteLLM Helm Chart
Step 1. Clone the repository
git clone https://github.com/BerriAI/litellm.git
Step 2. Deploy with Helm
Run the following command in the root of your litellm repo. This will set the litellm proxy master key as sk-1234
helm install \
  --set masterkey=sk-1234 \
  mydeploy \
  deploy/charts/litellm-helm
Step 3. Expose the service to localhost
kubectl \
  port-forward \
  service/mydeploy-litellm-helm \
  4000:4000
Your LiteLLM Proxy Server is now running on http://127.0.0.1:4000.
If you need to set your litellm proxy config.yaml, you can find this in values.yaml
[BETA] Helm Chart is BETA. If you run into an issues/have feedback please let us know https://github.com/BerriAI/litellm/issues
Use this when you want to use litellm helm chart as a dependency for other charts. The litellm-helm OCI is hosted here https://github.com/BerriAI/litellm/pkgs/container/litellm-helm
Step 1. Pull the litellm helm chart
helm pull oci://ghcr.io/berriai/litellm-helm

# Pulled: ghcr.io/berriai/litellm-helm:0.1.2
# Digest: sha256:7d3ded1c99c1597f9ad4dc49d84327cf1db6e0faa0eeea0c614be5526ae94e2a
Step 2. Unzip litellm helm
Unzip the specific version that was pulled in Step 1
tar -zxvf litellm-helm-0.1.2.tgz
Step 3. Install litellm helm
helm install lite-helm ./litellm-helm
Step 4. Expose the service to localhost
kubectl --namespace default port-forward $POD_NAME 8080:$CONTAINER_PORT
Your LiteLLM Proxy Server is now running on http://127.0.0.1:4000.
Deploy with Redis
Use Redis when you need litellm to load balance across multiple litellm containers
The only change required is setting Redis on your config.yaml
LiteLLM Proxy supports sharing rpm/tpm shared across multiple litellm instances, pass redis_host, redis_password and redis_port to enable this. (LiteLLM will use Redis to track rpm/tpm usage )
model_list:
  - model_name: gpt-3.5-turbo
    litellm_params:
      model: azure/<your-deployment-name>
      api_base: <your-azure-endpoint>
      api_key: <your-azure-api-key>
      rpm: 6      # Rate limit for this deployment: in requests per minute (rpm)
  - model_name: gpt-3.5-turbo
    litellm_params:
      model: azure/gpt-turbo-small-ca
      api_base: https://my-endpoint-canada-berri992.openai.azure.com/
      api_key: <your-azure-api-key>
      rpm: 6
router_settings:
  redis_host: <your redis host>
  redis_password: <your redis password>
  redis_port: 1992
Start docker container with config
docker run ghcr.io/berriai/litellm:main-latest --config your_config.yaml
Deploy with Database + Redis
The only change required is setting Redis on your config.yaml
LiteLLM Proxy supports sharing rpm/tpm shared across multiple litellm instances, pass redis_host, redis_password and redis_port to enable this. (LiteLLM will use Redis to track rpm/tpm usage )
model_list:
  - model_name: gpt-3.5-turbo
    litellm_params:
      model: azure/<your-deployment-name>
      api_base: <your-azure-endpoint>
      api_key: <your-azure-api-key>
      rpm: 6      # Rate limit for this deployment: in requests per minute (rpm)
  - model_name: gpt-3.5-turbo
    litellm_params:
      model: azure/gpt-turbo-small-ca
      api_base: https://my-endpoint-canada-berri992.openai.azure.com/
      api_key: <your-azure-api-key>
      rpm: 6
router_settings:
  redis_host: <your redis host>
  redis_password: <your redis password>
  redis_port: 1992
Start litellm-databasedocker container with config
docker run --name litellm-proxy \
-e DATABASE_URL=postgresql://<user>:<password>@<host>:<port>/<dbname> \
-p 4000:4000 \
ghcr.io/berriai/litellm-database:main-latest --config your_config.yaml
(Non Root) - without Internet Connection
By default prisma generate downloads prisma's engine binaries. This might cause errors when running without internet connection.
Use this docker image to deploy litellm with pre-generated prisma binaries.
docker pull ghcr.io/berriai/litellm-non_root:main-stable
Advanced Deployment Settings
1. Custom server root path (Proxy base url)
💥 Use this when you want to serve LiteLLM on a custom base url path like https://localhost:4000/api/v1
In a Kubernetes deployment, it's possible to utilize a shared DNS to host multiple applications by modifying the virtual service
Customize the root path to eliminate the need for employing multiple DNS configurations during deployment.
Step 1.
👉 Set SERVER_ROOT_PATH in your .env and this will be set as your server root path
export SERVER_ROOT_PATH="/api/v1"
Step 2 (If you want the Proxy Admin UI to work with your root path you need to use this dockerfile)
- Use the dockerfile below (it uses litellm as a base image)
- 👉 Set
UI_BASE_PATH=$SERVER_ROOT_PATH/uiin the Dockerfile, exampleUI_BASE_PATH=/api/v1/ui
Dockerfile
# Use the provided base image
FROM ghcr.io/berriai/litellm:main-latest

# Set the working directory to /app
WORKDIR /app

# Install Node.js and npm (adjust version as needed)
RUN apt-get update && apt-get install -y nodejs npm

# Copy the UI source into the container
COPY ./ui/litellm-dashboard /app/ui/litellm-dashboard

# Set an environment variable for UI_BASE_PATH
# This can be overridden at build time
# set UI_BASE_PATH to "<your server root path>/ui"
# 👇👇 Enter your UI_BASE_PATH here
ENV UI_BASE_PATH="/api/v1/ui"

# Build the UI with the specified UI_BASE_PATH
WORKDIR /app/ui/litellm-dashboard
RUN npm install
RUN UI_BASE_PATH=$UI_BASE_PATH npm run build

# Create the destination directory
RUN mkdir -p /app/litellm/proxy/_experimental/out

# Move the built files to the appropriate location
# Assuming the build output is in ./out directory
RUN rm -rf /app/litellm/proxy/_experimental/out/* && \
    mv ./out/* /app/litellm/proxy/_experimental/out/

# Switch back to the main app directory
WORKDIR /app

# Make sure your entrypoint.sh is executable
RUN chmod +x ./docker/entrypoint.sh

# Expose the necessary port
EXPOSE 4000/tcp

# Override the CMD instruction with your desired command and arguments
# only use --detailed_debug for debugging
CMD ["--port", "4000", "--config", "config.yaml"]
Step 3 build this Dockerfile
docker build -f Dockerfile -t litellm-prod-build . --progress=plain
Step 4. Run Proxy with SERVER_ROOT_PATH set in your env
docker run \
    -v $(pwd)/proxy_config.yaml:/app/config.yaml \
    -p 4000:4000 \
    -e LITELLM_LOG="DEBUG"\
    -e SERVER_ROOT_PATH="/api/v1"\
    -e DATABASE_URL=postgresql://<user>:<password>@<host>:<port>/<dbname> \
    -e LITELLM_MASTER_KEY="sk-1234"\
    litellm-prod-build \
    --config /app/config.yaml
After running the proxy you can access it on http://0.0.0.0:4000/api/v1/ (since we set SERVER_ROOT_PATH="/api/v1")
Step 5. Verify Running on correct path
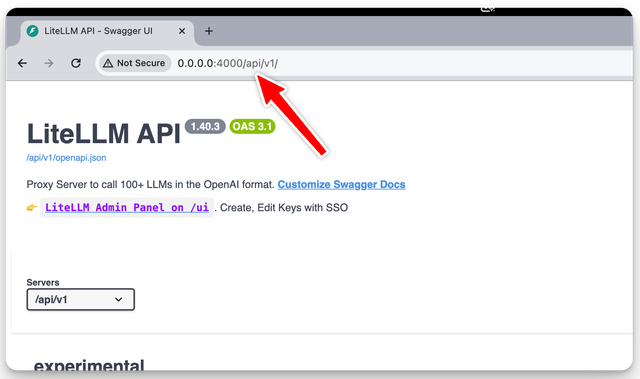
That's it, that's all you need to run the proxy on a custom root path
2. SSL Certification
Use this, If you need to set ssl certificates for your on prem litellm proxy
Pass ssl_keyfile_path (Path to the SSL keyfile) and ssl_certfile_path (Path to the SSL certfile) when starting litellm proxy
docker run ghcr.io/berriai/litellm:main-latest \
    --ssl_keyfile_path ssl_test/keyfile.key \
    --ssl_certfile_path ssl_test/certfile.crt
Provide an ssl certificate when starting litellm proxy server
3. Http/2 with Hypercorn
Use this if you want to run the proxy with hypercorn to support http/2
Step 1. Build your custom docker image with hypercorn
# Use the provided base image
FROM ghcr.io/berriai/litellm:main-latest

# Set the working directory to /app
WORKDIR /app

# Copy the configuration file into the container at /app
COPY config.yaml .

# Make sure your docker/entrypoint.sh is executable
RUN chmod +x ./docker/entrypoint.sh

# Expose the necessary port
EXPOSE 4000/tcp

# 👉 Key Change: Install hypercorn
RUN pip install hypercorn

# Override the CMD instruction with your desired command and arguments
# WARNING: FOR PROD DO NOT USE `--detailed_debug` it slows down response times, instead use the following CMD
# CMD ["--port", "4000", "--config", "config.yaml"]

CMD ["--port", "4000", "--config", "config.yaml", "--detailed_debug"]
Step 2. Pass the --run_hypercorn flag when starting the proxy
docker run \
    -v $(pwd)/proxy_config.yaml:/app/config.yaml \
    -p 4000:4000 \
    -e LITELLM_LOG="DEBUG"\
    -e SERVER_ROOT_PATH="/api/v1"\
    -e DATABASE_URL=postgresql://<user>:<password>@<host>:<port>/<dbname> \
    -e LITELLM_MASTER_KEY="sk-1234"\
    your_custom_docker_image \
    --config /app/config.yaml
    --run_hypercorn
4. config.yaml file on s3, GCS Bucket Object/url
Use this if you cannot mount a config file on your deployment service (example - AWS Fargate, Railway etc)
LiteLLM Proxy will read your config.yaml from an s3 Bucket or GCS Bucket
- GCS Bucket
- s3
Set the following .env vars
LITELLM_CONFIG_BUCKET_TYPE = "gcs"                              # set this to "gcs"
LITELLM_CONFIG_BUCKET_NAME = "litellm-proxy"                    # your bucket name on GCS
LITELLM_CONFIG_BUCKET_OBJECT_KEY = "proxy_config.yaml"         # object key on GCS
Start litellm proxy with these env vars - litellm will read your config from GCS
docker run --name litellm-proxy \
   -e DATABASE_URL=<database_url> \
   -e LITELLM_CONFIG_BUCKET_NAME=<bucket_name> \
   -e LITELLM_CONFIG_BUCKET_OBJECT_KEY="<object_key>> \
   -e LITELLM_CONFIG_BUCKET_TYPE="gcs" \
   -p 4000:4000 \
   ghcr.io/berriai/litellm-database:main-latest --detailed_debug
Set the following .env vars
LITELLM_CONFIG_BUCKET_NAME = "litellm-proxy"                    # your bucket name on s3
LITELLM_CONFIG_BUCKET_OBJECT_KEY = "litellm_proxy_config.yaml"  # object key on s3
Start litellm proxy with these env vars - litellm will read your config from s3
docker run --name litellm-proxy \
   -e DATABASE_URL=<database_url> \
   -e LITELLM_CONFIG_BUCKET_NAME=<bucket_name> \
   -e LITELLM_CONFIG_BUCKET_OBJECT_KEY="<object_key>> \
   -p 4000:4000 \
   ghcr.io/berriai/litellm-database:main-latest
Platform-specific Guide
- AWS EKS - Kubernetes
- AWS Cloud Formation Stack
- Google Cloud Run
- Render deploy
- Railway
Kubernetes (AWS EKS)
Step1. Create an EKS Cluster with the following spec
eksctl create cluster --name=litellm-cluster --region=us-west-2 --node-type=t2.small
Step 2. Mount litellm proxy config on kub cluster
This will mount your local file called proxy_config.yaml on kubernetes cluster
kubectl create configmap litellm-config --from-file=proxy_config.yaml
Step 3. Apply kub.yaml and service.yaml
Clone the following kub.yaml and service.yaml files and apply locally
Use this
kub.yamlfile - litellm kub.yamlUse this
service.yamlfile - litellm service.yaml
Apply kub.yaml
kubectl apply -f kub.yaml
Apply service.yaml - creates an AWS load balancer to expose the proxy
kubectl apply -f service.yaml

# service/litellm-service created
Step 4. Get Proxy Base URL
kubectl get services

# litellm-service   LoadBalancer   10.100.6.31   a472dc7c273fd47fd******.us-west-2.elb.amazonaws.com   4000:30374/TCP   63m
Proxy Base URL = a472dc7c273fd47fd******.us-west-2.elb.amazonaws.com:4000
That's it, now you can start using LiteLLM Proxy
AWS Cloud Formation Stack
LiteLLM AWS Cloudformation Stack - Get the best LiteLLM AutoScaling Policy and Provision the DB for LiteLLM Proxy
This will provision:
- LiteLLMServer - EC2 Instance
- LiteLLMServerAutoScalingGroup
- LiteLLMServerScalingPolicy (autoscaling policy)
- LiteLLMDB - RDS::DBInstance
Using AWS Cloud Formation Stack
LiteLLM Cloudformation stack is located here - litellm.yaml
1. Create the CloudFormation Stack:
In the AWS Management Console, navigate to the CloudFormation service, and click on "Create Stack."
On the "Create Stack" page, select "Upload a template file" and choose the litellm.yaml file
Now monitor the stack was created successfully.
2. Get the Database URL:
Once the stack is created, get the DatabaseURL of the Database resource, copy this value
3. Connect to the EC2 Instance and deploy litellm on the EC2 container
From the EC2 console, connect to the instance created by the stack (e.g., using SSH).
Run the following command, replacing <database_url> with the value you copied in step 2
docker run --name litellm-proxy \
   -e DATABASE_URL=<database_url> \
   -p 4000:4000 \
   ghcr.io/berriai/litellm-database:main-latest
4. Access the Application:
Once the container is running, you can access the application by going to http://<ec2-public-ip>:4000 in your browser.
Google Cloud Run
Fork this repo - github.com/BerriAI/example_litellm_gcp_cloud_run
Edit the
litellm_config.yamlfile in the repo to include your model settingsDeploy your forked github repo on Google Cloud Run
Testing your deployed proxy
Assuming the required keys are set as Environment Variables
https://litellm-7yjrj3ha2q-uc.a.run.app is our example proxy, substitute it with your deployed cloud run app
curl https://litellm-7yjrj3ha2q-uc.a.run.app/v1/chat/completions \
  -H "Content-Type: application/json" \
  -d '{
     "model": "gpt-3.5-turbo",
     "messages": [{"role": "user", "content": "Say this is a test!"}],
     "temperature": 0.7
   }'
Render
Railway
Step 1: Click the button to deploy to Railway

Step 2: Set PORT = 4000 on Railway Environment Variables
Extras
Docker compose
Step 1
- (Recommended) Use the example file
docker-compose.ymlgiven in the project root. e.g. https://github.com/BerriAI/litellm/blob/main/docker-compose.yml
Here's an example docker-compose.yml file
version: "3.9"
services:
  litellm:
    build:
      context: .
      args:
        target: runtime
    image: ghcr.io/berriai/litellm:main-latest
    ports:
      - "4000:4000" # Map the container port to the host, change the host port if necessary
    volumes:
      - ./litellm-config.yaml:/app/config.yaml # Mount the local configuration file
    # You can change the port or number of workers as per your requirements or pass any new supported CLI argument. Make sure the port passed here matches with the container port defined above in `ports` value
    command: [ "--config", "/app/config.yaml", "--port", "4000", "--num_workers", "8" ]

# ...rest of your docker-compose config if any
Step 2
Create a litellm-config.yaml file with your LiteLLM config relative to your docker-compose.yml file.
Check the config doc here
Step 3
Run the command docker-compose up or docker compose up as per your docker installation.
Use
-dflag to run the container in detached mode (background) e.g.docker compose up -d
Your LiteLLM container should be running now on the defined port e.g. 4000.
IAM-based Auth for RDS DB
- Set AWS env var
export AWS_WEB_IDENTITY_TOKEN='/path/to/token'
export AWS_ROLE_NAME='arn:aws:iam::123456789012:role/MyRole'
export AWS_SESSION_NAME='MySession'
- Add RDS credentials to env
export DATABASE_USER="db-user"
export DATABASE_PORT="5432"
export DATABASE_HOST="database-1-instance-1.cs1ksmwz2xt3.us-west-2.rds.amazonaws.com"
export DATABASE_NAME="database-1-instance-1"
export DATABASE_SCHEMA="schema-name" # skip to use the default "public" schema
- Run proxy with iam+rds
litellm --config /path/to/config.yaml --iam_token_db_auth
✨ Blocking web crawlers
Note: This is an enterprise only feature.
To block web crawlers from indexing the proxy server endpoints, set the block_robots setting to true in your litellm_config.yaml file.
general_settings:
  block_robots: true
How it works
When this is enabled, the /robots.txt endpoint will return a 200 status code with the following content:
User-agent: *
Disallow: /